IDEA编译Spring 5.2.x源码
参考:Spring 5.2.x 源码编译1 Spring 5.2.x 源码编译2
spring源码下载地址:github gitee gitee下载速度更快一点
编译环境:
JDK:1.8.0_202
Gradle:5.6.4
IDEA:2019.3.5
Gradle版本是5.6.4,因为spring 5.2.x版本使用的是Gradle5.6.4版本构建的
在该路径下:Spring-Framework/ gradle/wrapper/gradle-wrapper.properties,能看到spring需要的gradle版本,下载对应的版本安装gradle就行,否则会出现错误。
spring的gradle配置里面添加阿里云镜像库:
添加阿里云镜像是加快下载spring源码依赖的jar包。如果不使用阿里云镜像库,下载速度很慢,需要等两三个小时。
1.修改源码根目录的build.gradle文件,增加阿里云镜像库
maven { url 'https://maven.aliyun.com/nexus/content/groups/public/' }
maven { url 'https://maven.aliyun.com/nexus/content/repositories/jcenter'}

2.修改源码根目录的settings.gradle文件,增加阿里云镜像库

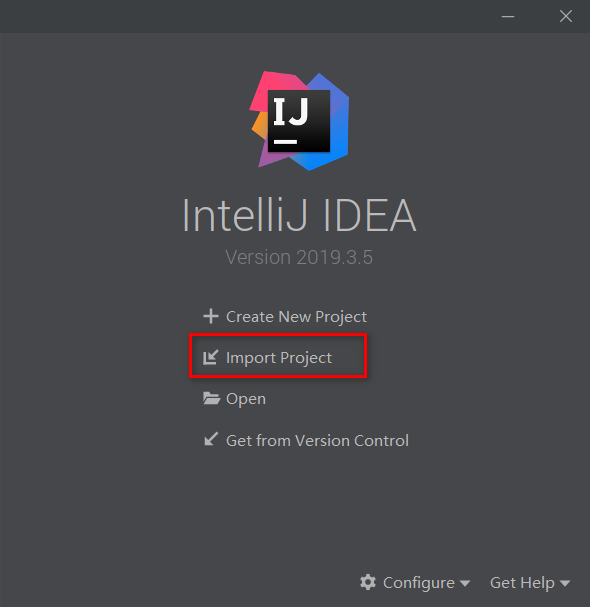
将下载的spring源码导入IDEA:
等待spring源码依赖jar包下载完成:下载时间有点长
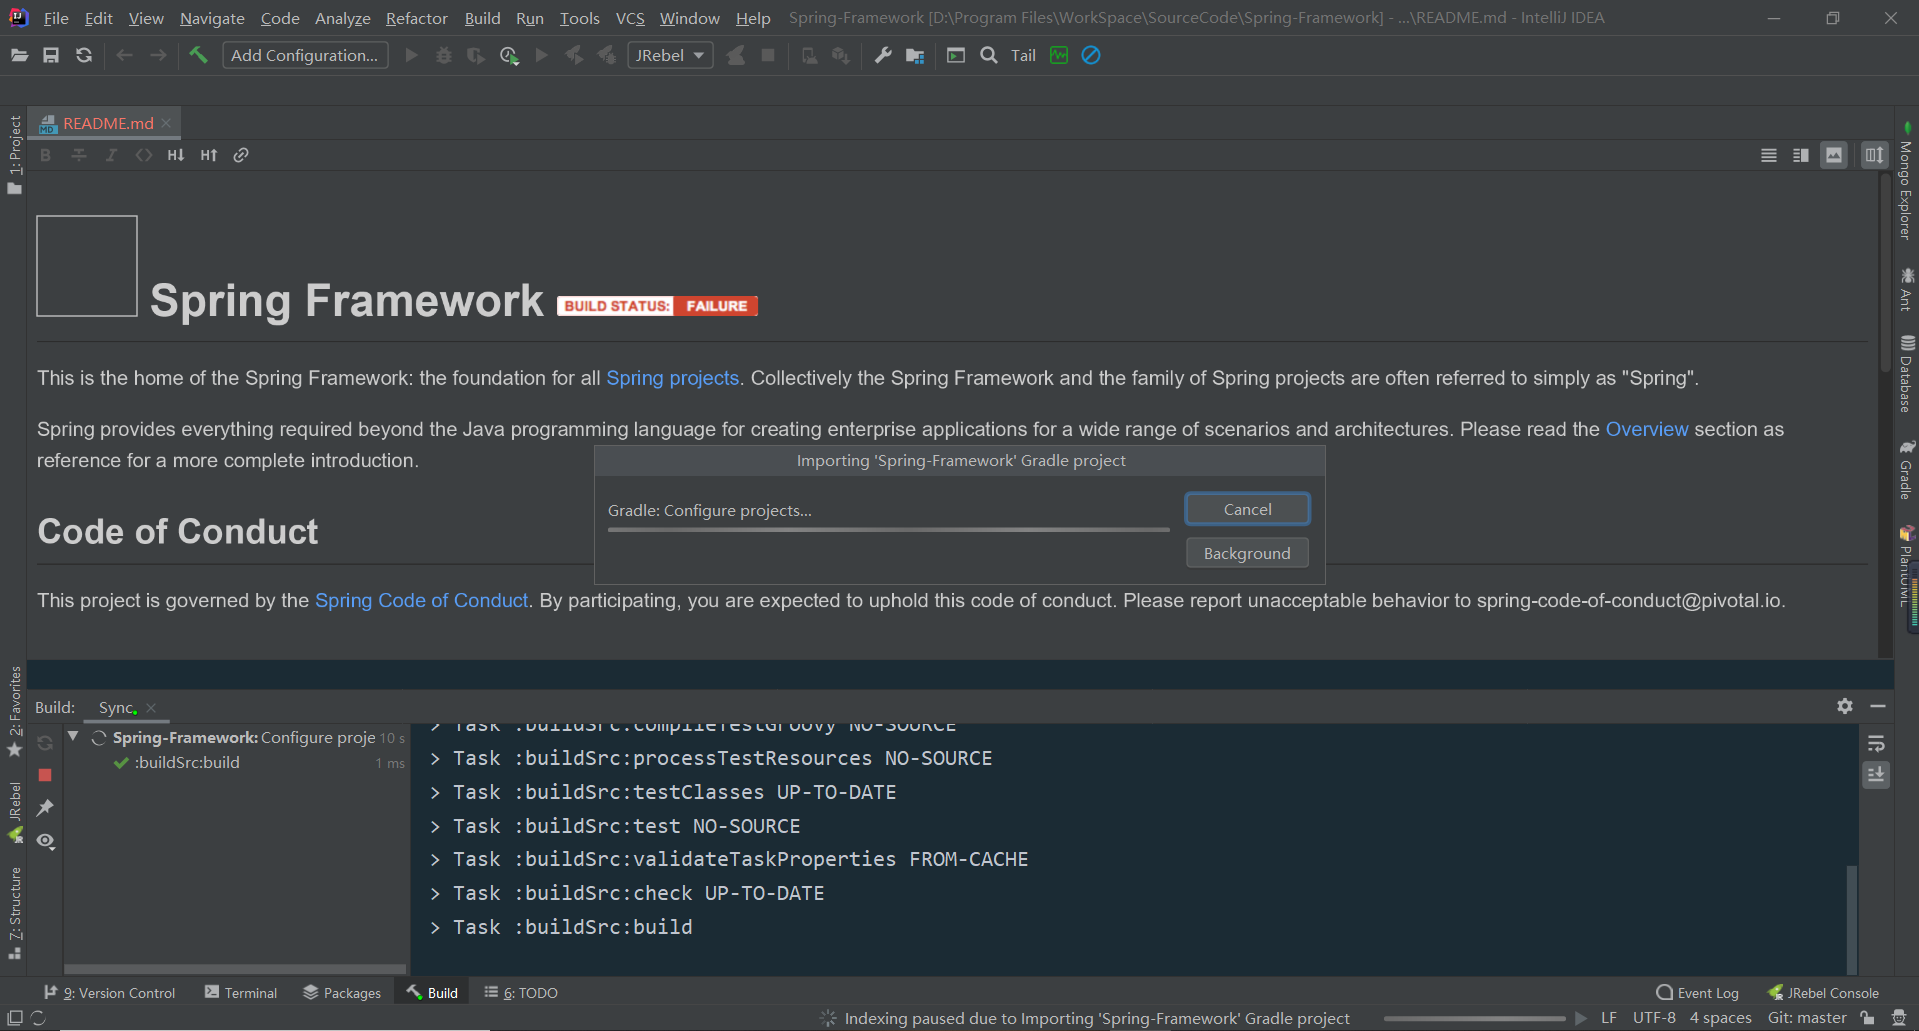
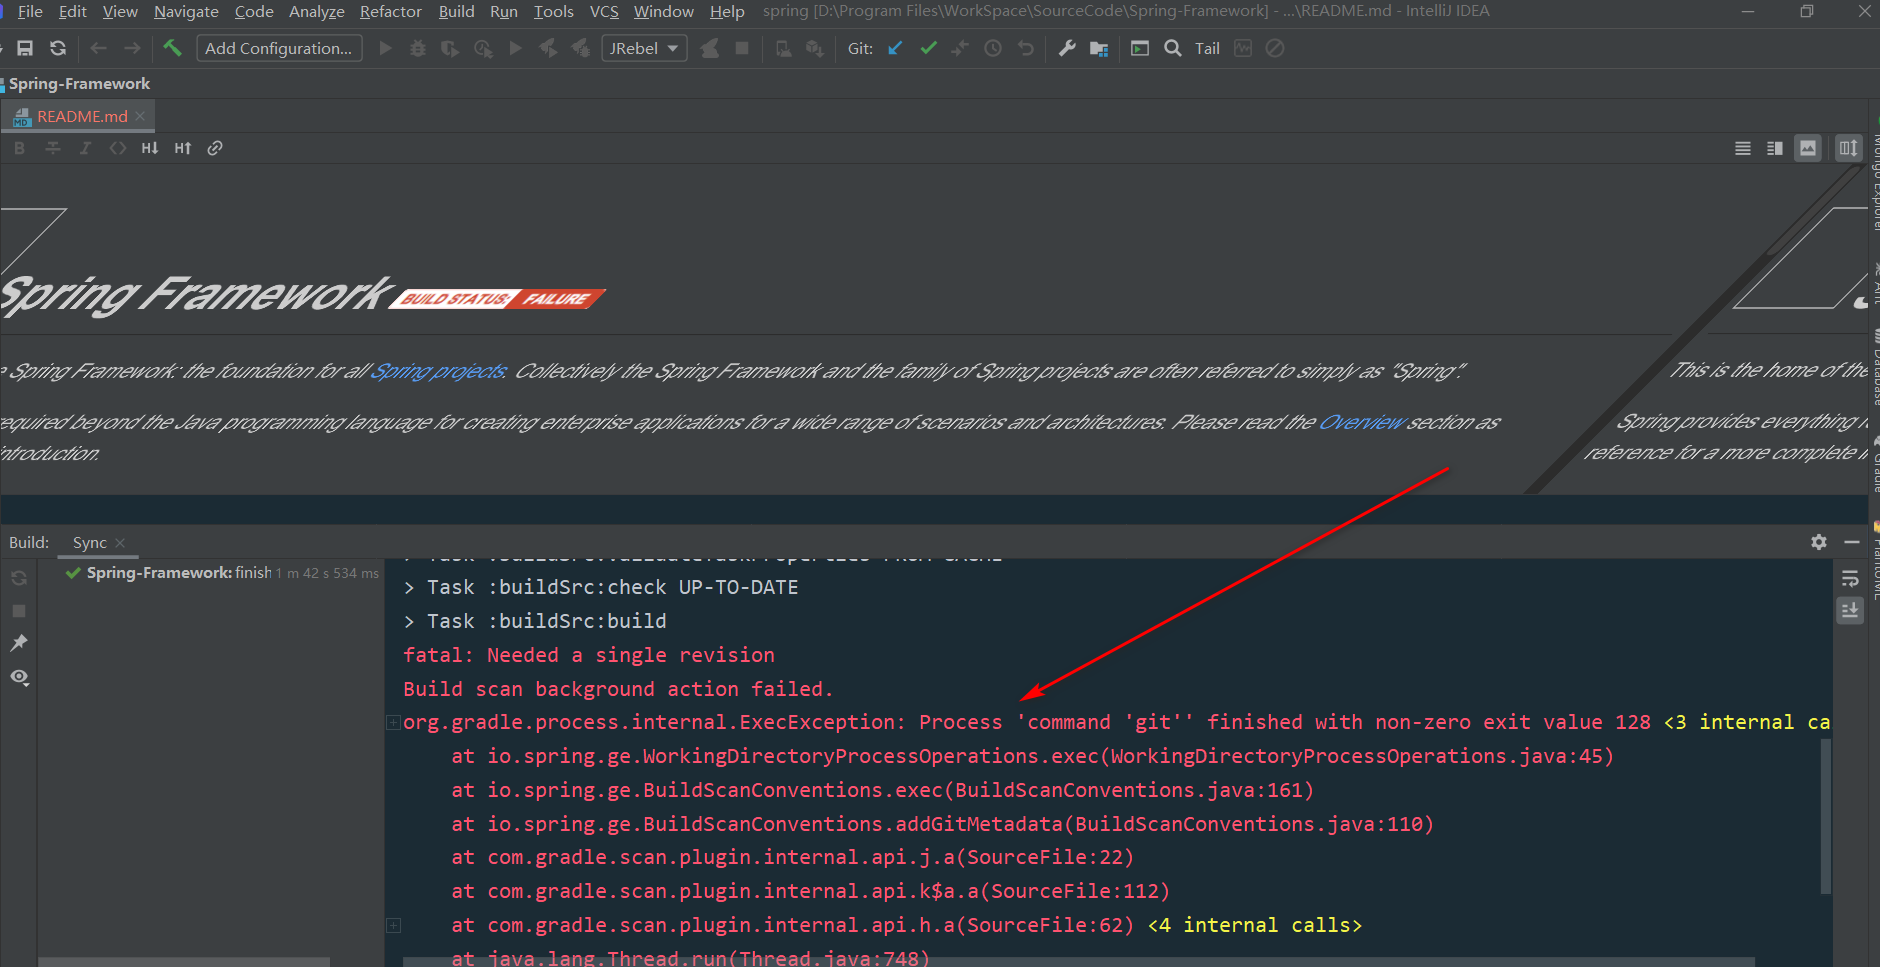
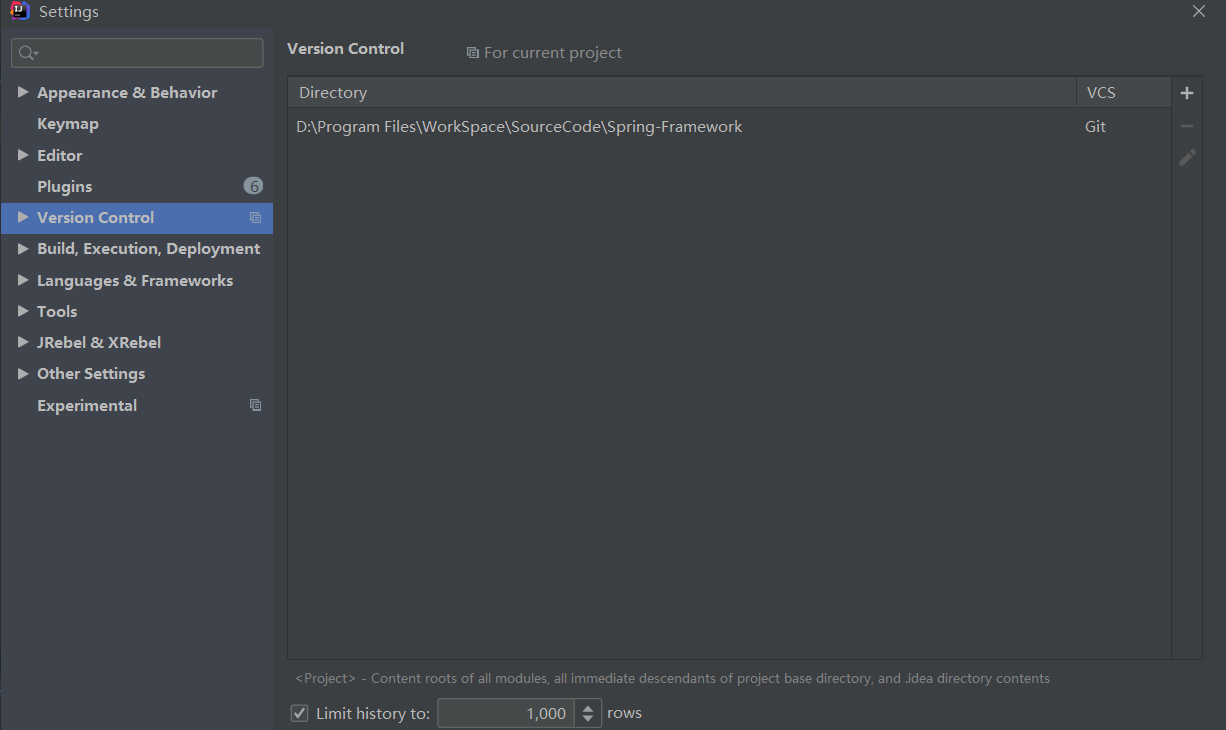
下载编译完成后出现一下错误,需要将spring 加入本地git版本控制后,才不会出现该错误。
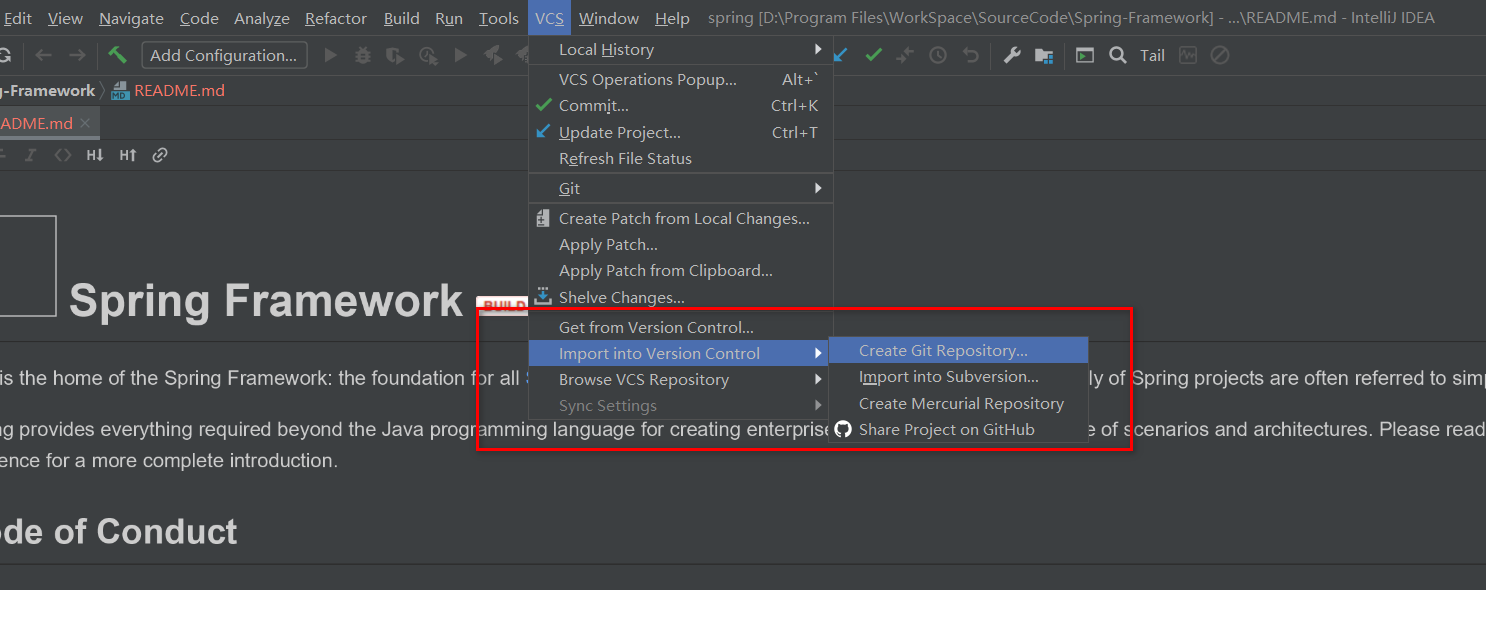
spring 加入本地git版本控制:
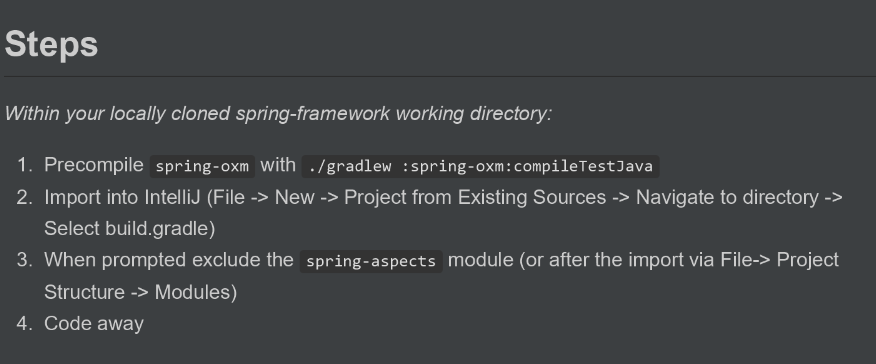
spring源码的根路径下有一个import-into-idea.md的文件,介绍导入spring源码的步骤
我们在控制台输入以下命令进行编译:
gradlew :spring-oxm:compileTestJava
执行完成后如下:报错的 Process ‘command ‘git’’ finished with non-zero exit value 128 不影响,解决该错误需要将spring 加入本地git版本控制

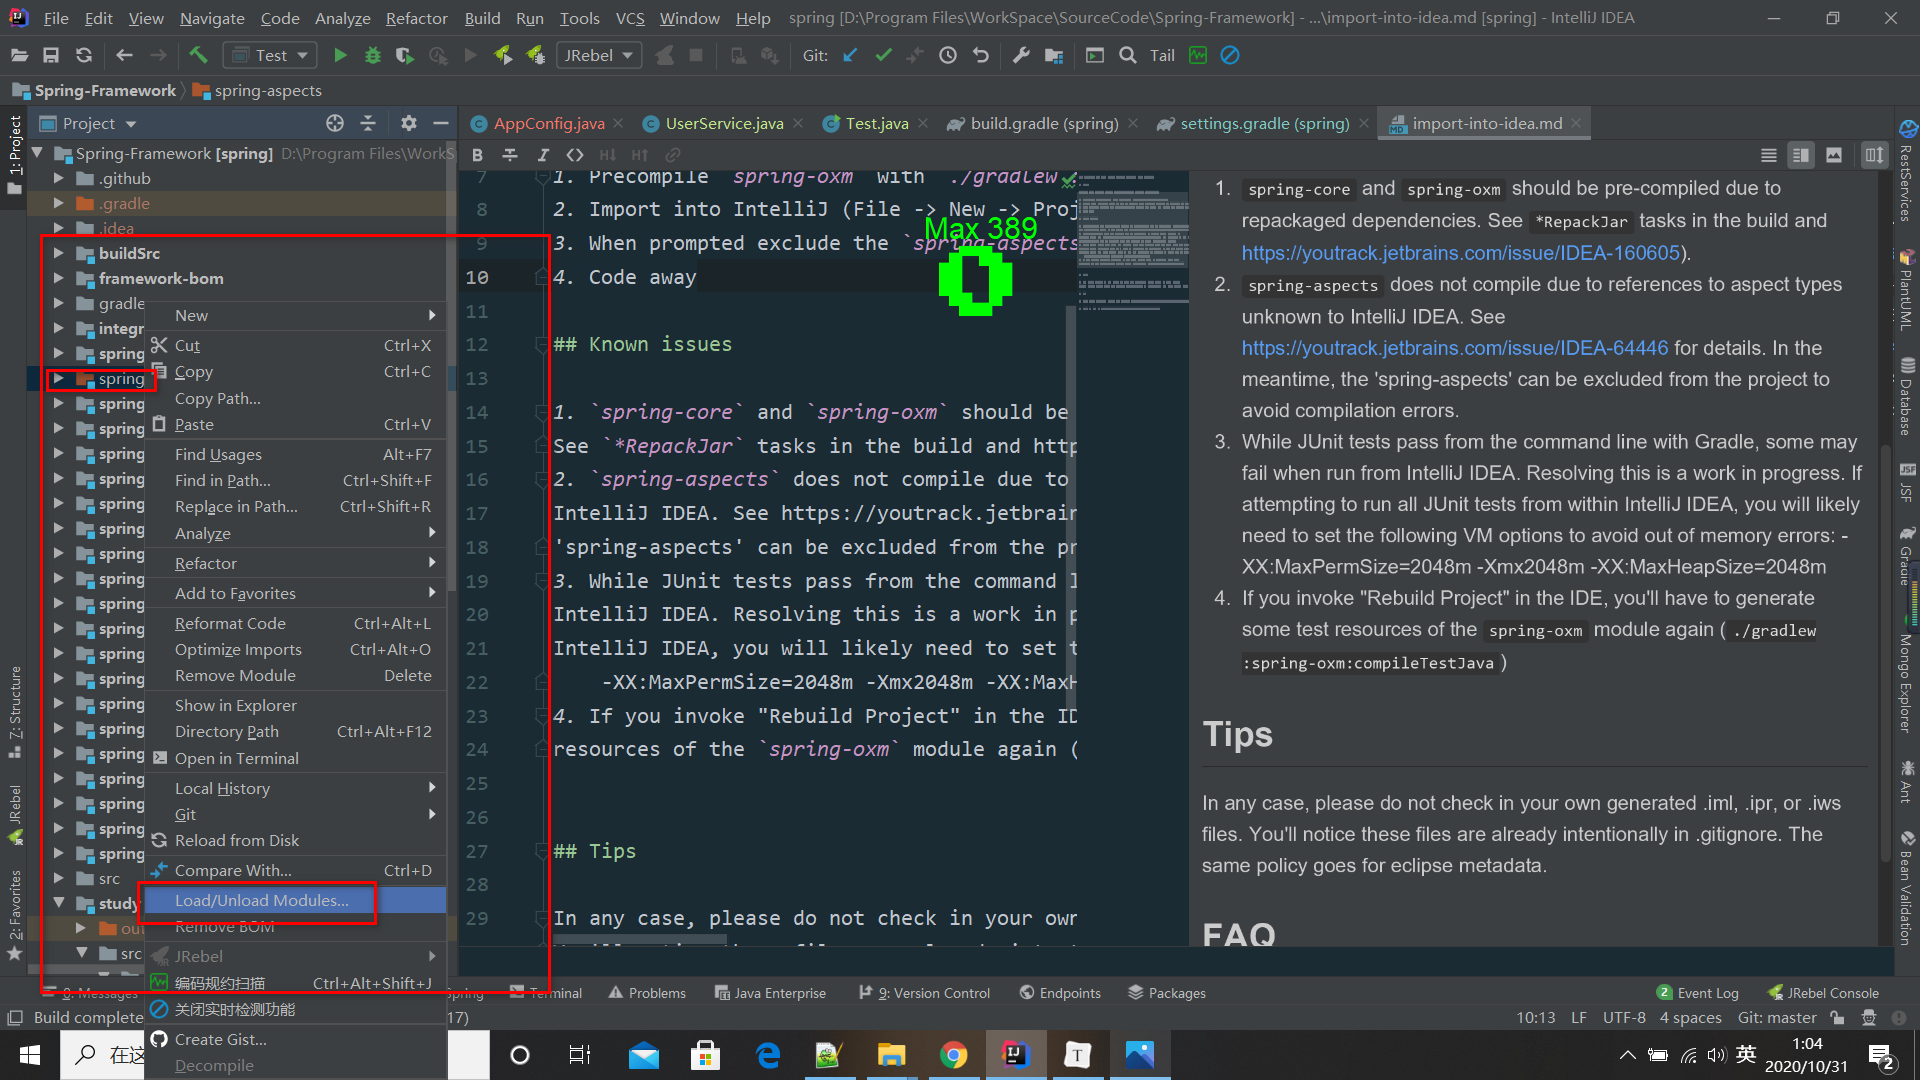
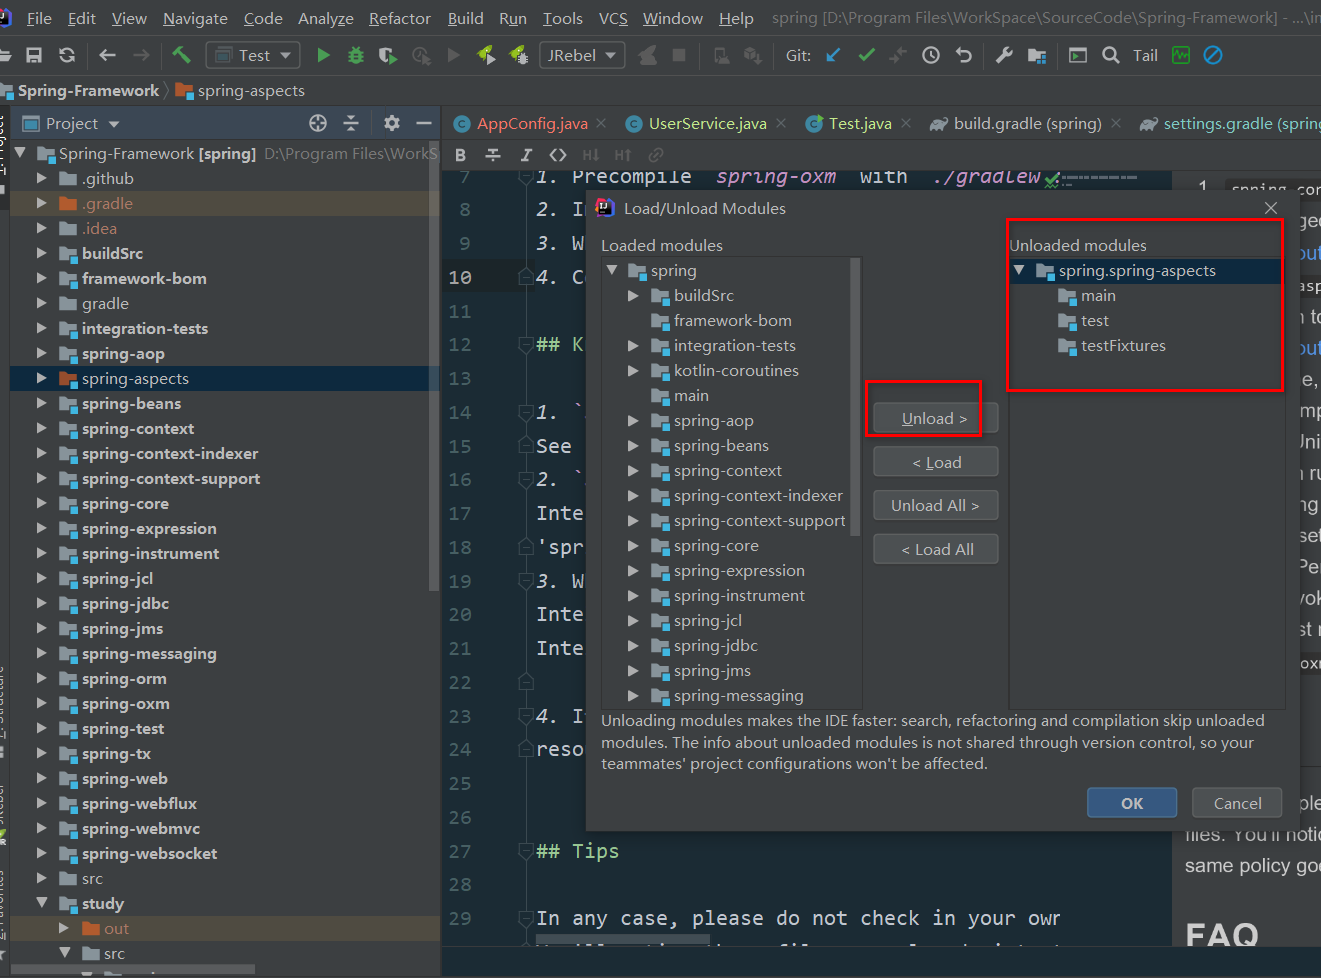
排除spring-aspects模块:需要安装其他的jar包,这里为了解决报错就排除掉
新建测试module进行测试:
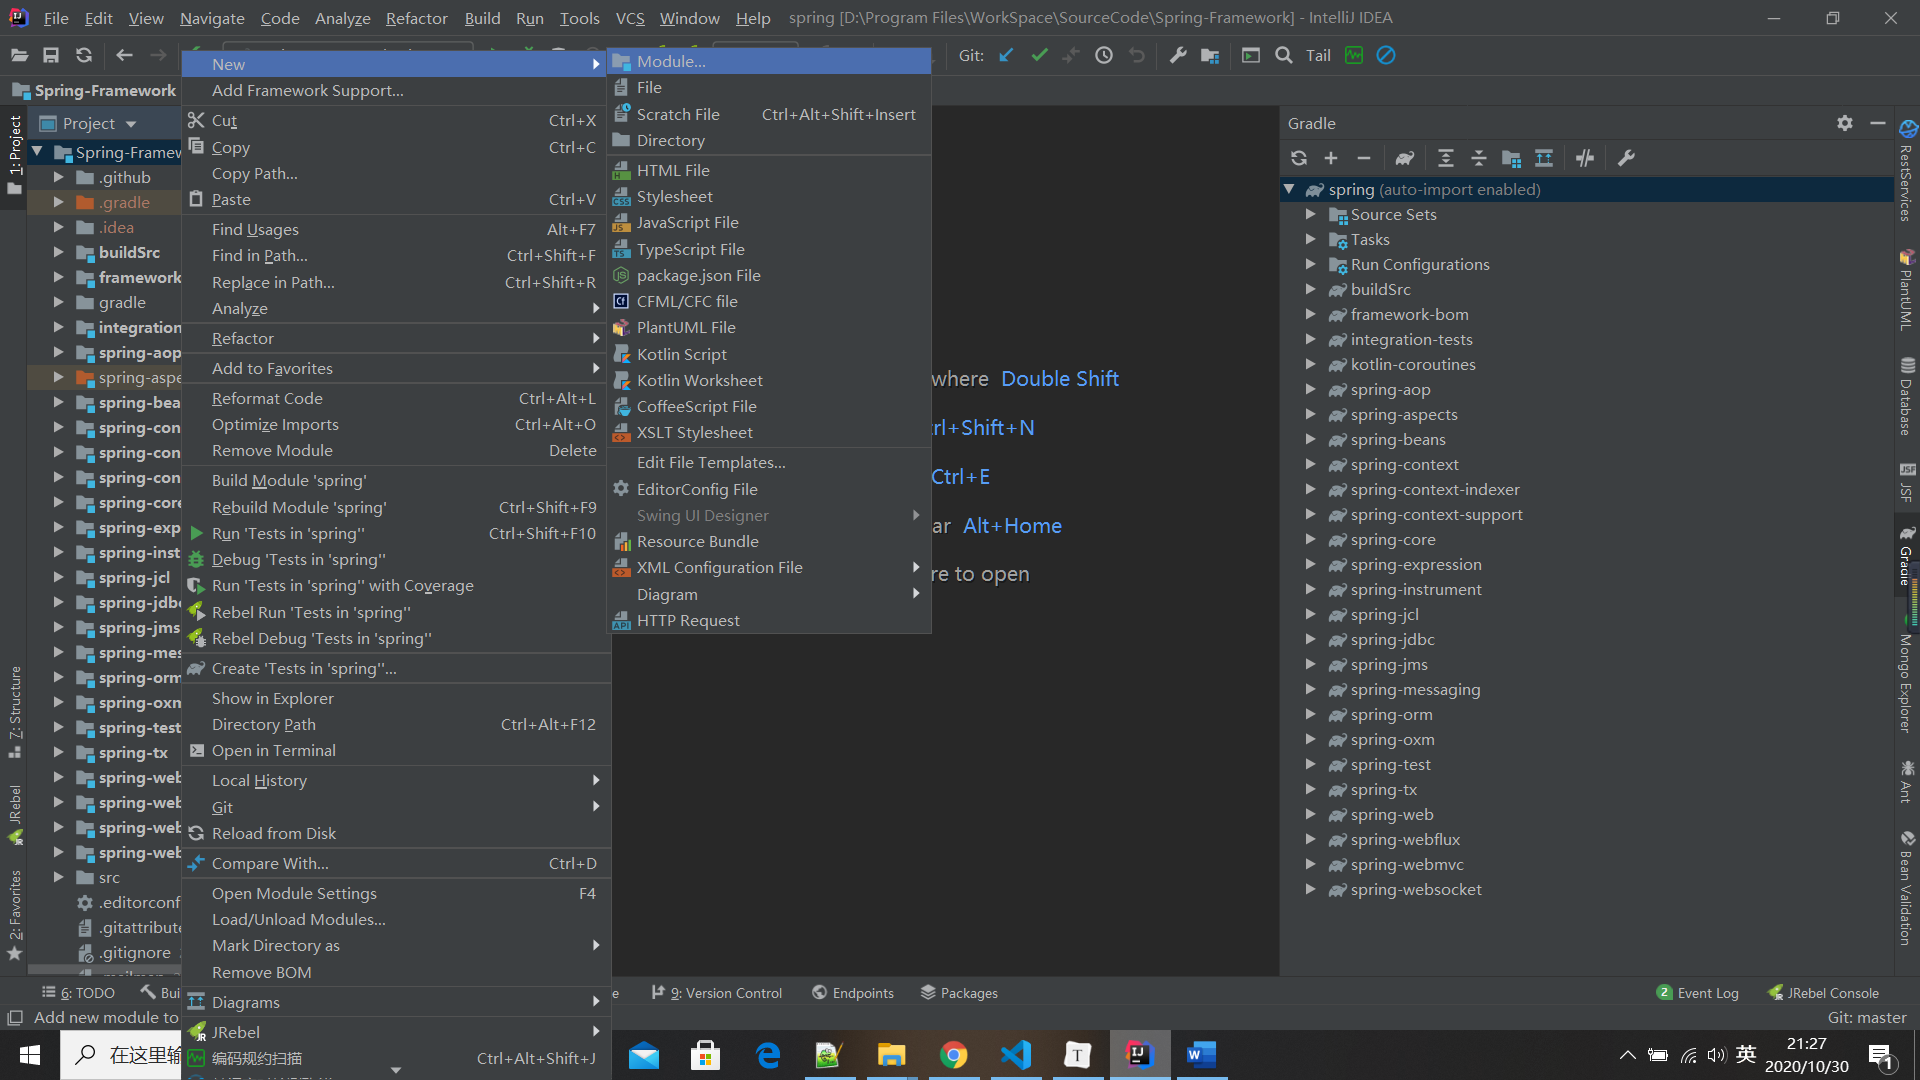
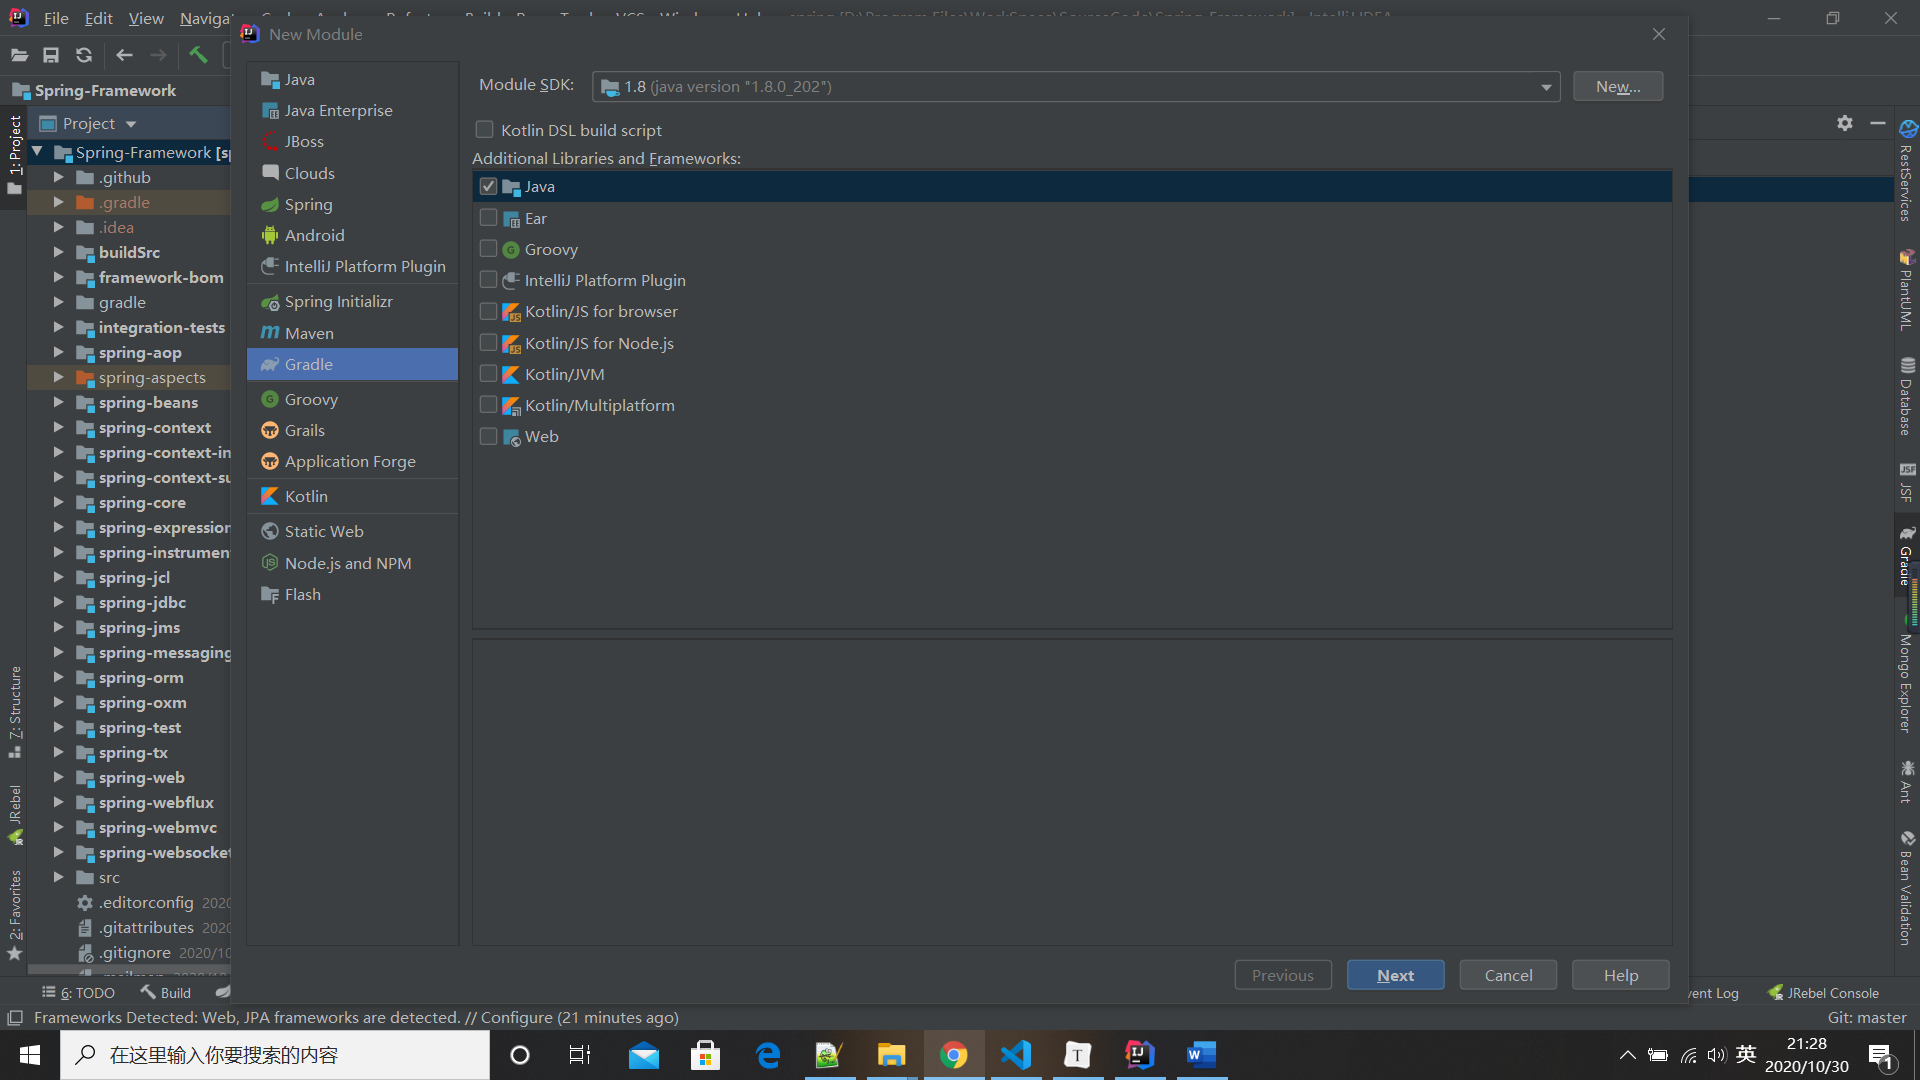
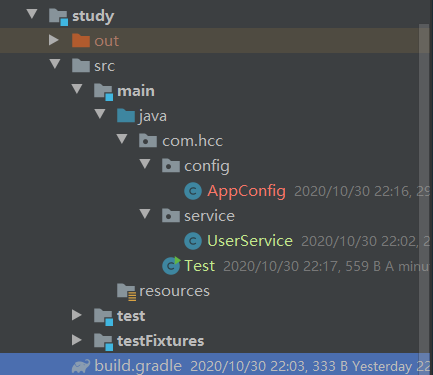
build.gradle里面增加依赖 compile(project(":spring-context"))
build.gradle:

plugins {
    id 'java'
}

group 'org.springframework'
version '5.2.11.BUILD-SNAPSHOT'

sourceCompatibility = 1.8

repositories {
    mavenCentral()
}

dependencies {
    testCompile group: 'junit', name: 'junit', version: '4.12'
    compile(project(":spring-context"))
    compile(project(":spring-instrument"))
}
package com.hcc.config;

import org.springframework.context.annotation.ComponentScan;
import org.springframework.context.annotation.Configuration;

/**
 * @author HuangCanCan
 * @version 1.0
 * @date 2020/10/30 21:35
 **/
@Configuration
@ComponentScan("com.hcc.service")
public class AppConfig {

}
package com.hcc.service;

import org.springframework.stereotype.Service;

/**
 * @author HuangCanCan
 * @version 1.0
 * @date 2020/10/30 21:43
 **/
@Service
public class UserService {

	public void get() {
		System.out.println("UserService...");
	}
}
package com.hcc;

import com.hcc.config.AppConfig;
import com.hcc.service.UserService;
import org.springframework.context.annotation.AnnotationConfigApplicationContext;

/**
 * @author HuangCanCan
 * @version 1.0
 * @date 2020/10/30 21:46
 **/
public class Test {

	public static void main(String[] args) {
		AnnotationConfigApplicationContext applicationContext = new AnnotationConfigApplicationContext(AppConfig.class);
		UserService userService = applicationContext.getBean(UserService.class);
		System.out.println(userService);
		userService.get();
	}

}
输出结果:
com.hcc.service.UserService@4c75cab9
UserService...
运行时,需要改一下如下配置:
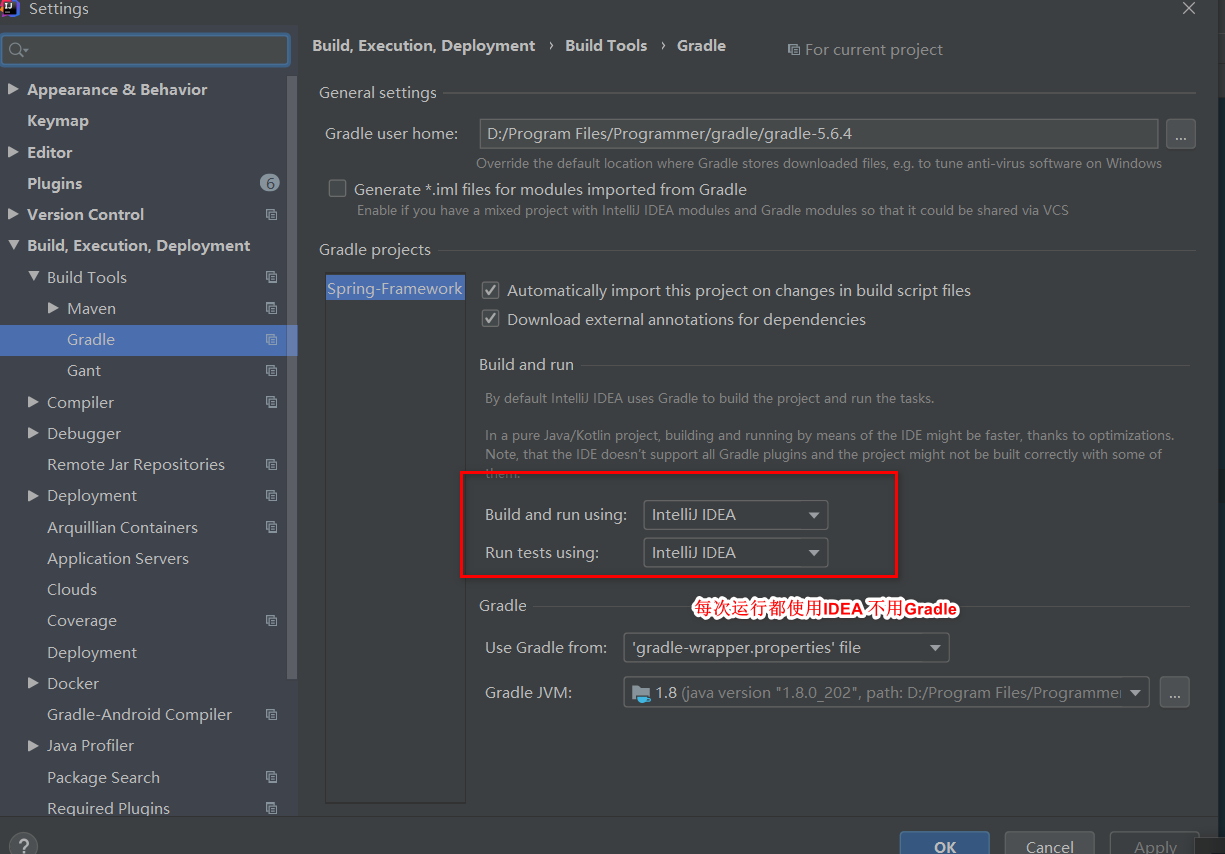
到此,spring源码编译过程完毕。